As much fun as jumping on a trampoline is, safety is always a priority. It all starts with proper installation. Get a quick overview of the key steps involved in installing an in-ground trampoline to ensure a safe and unforgettable jumping experience.
Always read the instructions before you start installing a trampoline. These usually come with the trampoline and contain all the key information about the installation and components. First, check that all the components are included and what tools you need, then get to work!
For more detailed information on all steps of installing an inground trampoline, watch this video.
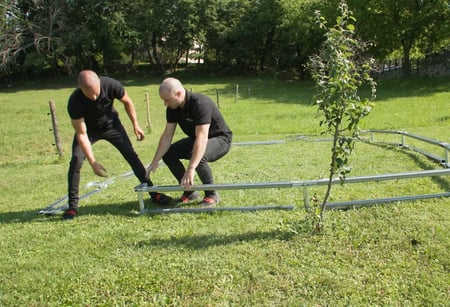
Step 1: Assembling the frame
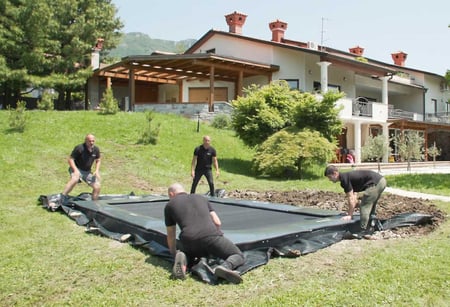
If you have already found a spot in your backyard where you want to place the trampoline, the first step is to assemble the frame – and the easiest way to do this is directly in your backyard.
Lay the frame parts on the ground and assemble them so they all fit together perfectly. Place the jumping mat on the ground inside the frame, making sure it’s facing the right way. First attach the jumping mat with the springs at the four different ends, in the 12 o'clock, 3 o'clock, 6 o'clock, and 9 o'clock positions. Then attach the remaining trampoline springs.
If you choose an Akrobat trampoline, this step will be very fast, very easy and you’ll need no tools. This is because all Akrobat trampolines boast the innovative AkroCLICK® smart system, which is currently the easiest way to assemble a trampoline.
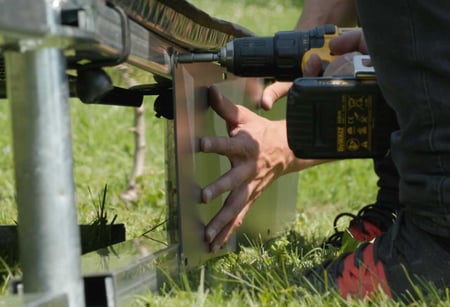
Step 2: Attaching the PVC retaining panels
The next step is to screw the PVC retaining wall panels to the frame to prevent soil from falling between the tubing of the frame and provide additional stability. You’ll need a suitable screwdriver and use the screws that come with your trampoline.
Place each panel against the outside of the frame, then insert and tighten the screws to secure the panel firmly to it. Repeat the procedure with all remaining panels.
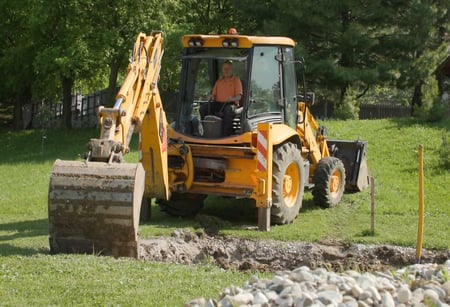
Step 3: Digging the in-ground trampoline pit
Now comes the hardest part of installing an in-ground trampoline – digging the hole in which you’ll place the trampoline.
First, the size of the hole needs to be determined. The easiest way to do this is to place the assembled frame in the chosen location and mark a hole that’s slightly wider than the frame itself.
When digging the pit, you must be careful to first dig an outer hole 25 cm deep, or as deep as the height of the trampoline frame. When you place the frame on the hole's edge, it should be just above grass level. Then, about 20 cm from the edge, dig an inner hole with a bowl-shaped bottom deep enough so that the trampoline does not come into contact with the ground upon landing.
You can dig the pit with a shovel, digger, or hoe, but please note that digging by hand can be tiring, especially if your trampoline is a large one. In this case, you’ll need extra help or you can hire a mini digger, which will help you get the job done faster and with considerably less effort.
Step 4: Drainage and protection of the pit from weeds
Water should not accumulate in the pit, so it’s important to ensure proper drainage. This is particularly important in the event of heavy rainfall and also prevents the walls from eroding over time and the trampoline from subsiding.
Cover the pit with a weed protection membrane so that it fits neatly and snugly into the shape of the pit, leaving enough room for jumping. You can use any weed control membrane of a suitable size for this purpose.
Step 5: Placing the in-ground trampoline into the pit
Place the trampoline in the prepared pit, making sure that it’s properly aligned with the ground. Fill the remaining free space around the trampoline with the remaining soil so that the trampoline does not move. Finally, cut off the excess material of the weed protection membrane.
When installing the trampoline, make sure that there are no gaps between the ground and the trampoline. To do this, compact the soil as much as possible to ensure extra stability and proper alignment with the ground.
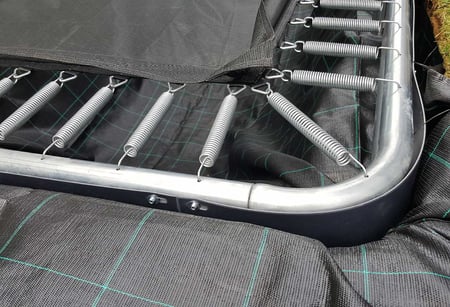
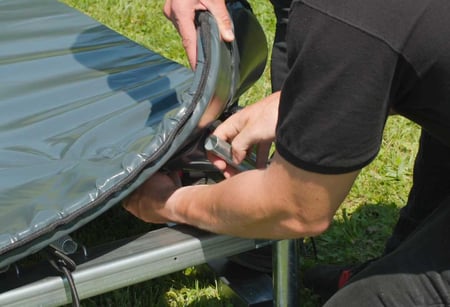
Step 6: Attaching the safety pad to the frame
Place the safety pads on the trampoline frame and springs, and align them so that they cover the entire frame and all springs. The pads must be properly secured so that they don’t move during jumping and remain firmly in place.
When fitting the safety pads to the frame, it’s essential that you carefully follow the manufacturer's instructions.
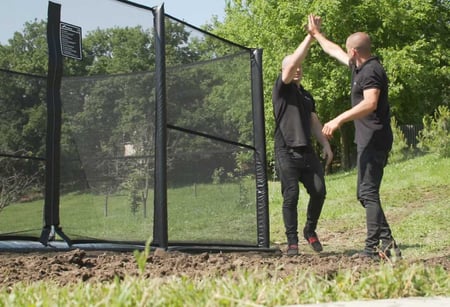
If you have correctly followed all the steps above, your in-ground trampoline is now securely installed. All that's left is to enjoy some carefree trampolining fun!
For more detailed information on all steps of installing a trampoline, watch this video.